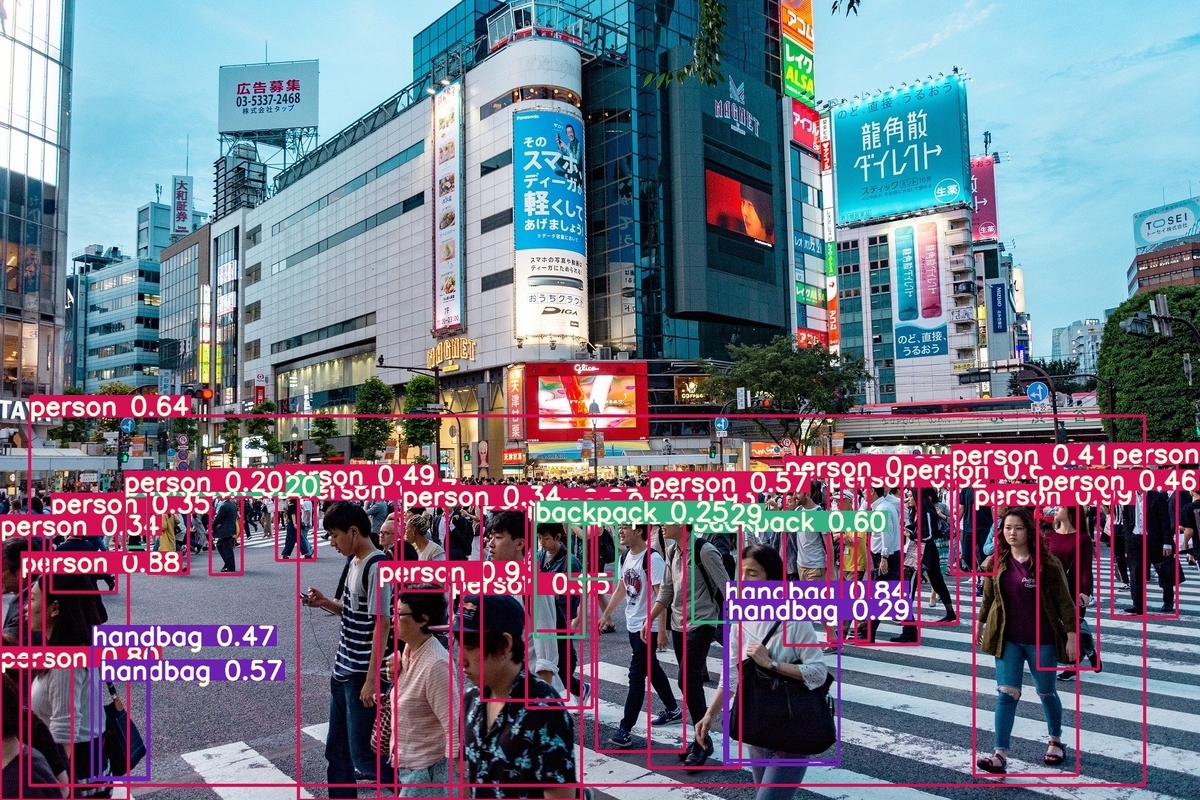
PytorchでYOLOv3とYOLOv4の推論を実行した。
- 20/05/03
- Ubuntu18.04.4
- GeForce RTX 2060
- Docker version 19.03.8
- Darknetより扱いやすい
- Yolov4も実行できた。
Darknetは以下の記事参照
1. Dockerで実行環境を構築
# Pull Image
docker pull ultralytics/yolov3:v0

# Rename Image
docker tag ultralytics/yolov3:v0 yolo-pytorch
docker image rm ultralytics/yolov3:v0

# Make Workspace
mkdir YOLOv3-PyTorch
cd YOLOv3-PyTorch

# Clone repogitry
git clone https://github.com/ultralytics/yolov3.git
cd yolov3
sudo rm -r .git

# Run Container
# $PWD=~/YOLOv3-PyTorch/yolov3
docker run -it --rm \
    --gpus all \
    --ipc=host \
    -v /etc/group:/etc/group:ro \
    -v /etc/passwd:/etc/passwd:ro \
    -u $(id -u $USER):$(id -g $USER) \
    -v $PWD:/workspace/yolov3 \
    -w /workspace/yolov3 \
    yolo-pytorch
2. 推論を実行
## on Container
# Inference yolov3-tiny
python3 detect.py --cfg cfg/yolov3-tiny.cfg --weights yolov3-tiny.pt --img-size 416 --source data/samples/zidane.jpg
Results are stored in /workspace/yolov3/output

3. Darknet weight to Pytorch weight
weightsを/yolov3/weightsに格納する。
weightsを変換
# YOLOv4
python3 -c "from models import *; convert('cfg/yolov4.cfg', 'weights/yolov4.weights')"
mv converted.pt yolov4.pt

# YOLOv3
python3 -c "from models import *; convert('cfg/yolov3.cfg', 'weights/yolov3.weights')"
mv converted.pt yolov3.pt
4. Inference YOLOv4 & YOLOv3
Sofia TerzoniによるPixabayからの画像
Inference
# Yolov4 処理時間:0.040s
python3 detect.py --cfg cfg/yolov4.cfg --weights yolov4.pt --img-size 608 --source data/samples/japan-4141578_1920.jpg --output output_yolov4_608

# Yolov3 処理時間:0.019s
python3 detect.py --cfg cfg/yolov3.cfg --weights yolov3.pt --img-size 416 --source data/samples/japan-4141578_1920.jpg --output output_yolov3_416

# Yolov3-tiny 処理時間:0.005s
python3 detect.py --cfg cfg/yolov3-tiny.cfg --weights yolov3-tiny.pt --img-size 416 --source data/samples/japan-4141578_1920.jpg --output output_yolov3-tiny
YOLOv4 結果画像

YOLOv3 結果画像

YOLOv3-tiny 結果画像

以上。